Install and connect SoftEther VPN in OpenWrt
1. Installing SoftEther VPN client in OpenWrt – 1.1. Enabling SSH – 1.2. Installing SoftEther VPN client using SSH 2. Setting SoftEther VPN client in OpenWrt – 2.1. Importing configs – 2.2. Connecting 3. Setting SoftEther VPN routing in OpenWrt – 3.1. Adding network interface – 3.2. Changing default gateway 4. Connecting SoftEther VPN on bootThis article is based on OpenWrt 22.03.2. Check the availability of OpenVPN packages for the older versions of OpenWrt on the official site.
OpenWrt device has to have internet access.
1. Installing SoftEther VPN client
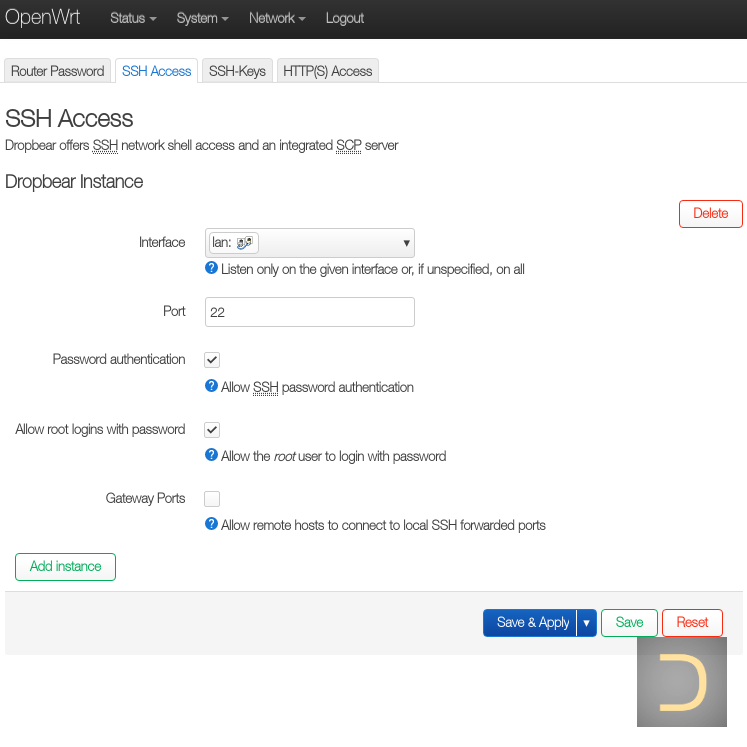
It is necessary to connect to OpenWrt device using SSH for the installing SoftEther VPN client. SSH access is disabled by default in OpenWrt. It is required to set administrator password and enable SSH access to make SSH connection available.1.1. Enabling SSH
All actions described in this subparagraph have to execute in the web interface of OpenWrt only.
Go to menu System -> Administration -> Router Password, enter password in the field Password and confirm the password in the field Confirmation, click Save to save and apply the changes.

1.2. Installing SoftEther VPN client
All actions described in this subparagraph have to execute in SSH session of OpenWrt only.
Commands beginning with the prompt # are executed as the root user, the prompt $ means the execution is from a regular user.
First of all update the list of available packages from SSH session that has root permissions.
# opkg updateThe next step is the installing packages softethervpn5-libs and softethervpn5-client.
# opkg install softethervpn5-libs softethervpn5-client
2. Setting SoftEther VPN client
All actions described in this paragraph have to execute in SSH session of OpenWrt only.
The importing configs, setting username and password in OpenWrt are the similar to the setting in Linux, except some differences caused the features of installation SoftEther VPN client and architecture of OpenWrt device.
2.1. Importing configs
It is required the utility unzip (it is not installed in OpenWrt by default) to download ZIP with SoftEther VPN configs and unpack it.# opkg install unzipChange directory to /tmp after it, download the archive file and unpack it.
# cd /tmp
# wget https://data.dwv.one/net-XXX-XXXXXXXXXXXXXXXXXXX/softether/all.zip
Replace the link https://data.dwv.one/net-XXX-XXXXXXXXXXXXXXXXXXX/softether/all.zip by the real in the example above. Use web browser for it: follow the link, choose the file, copy link of it and paste it to the SSH session window.
Unpack the archive.
# unzip all.zip
It is not necessary download archive of all SoftEther VPN configs, you may select and download a specific configs (Single chains and Double chains).
Import one or more selected configs to VPN client. In the example below is shown the command for the importing VPN chain DoubleSSL_PL1_RU1, if current directory is /tmp, config file is DoubleSSL_PL1_RU1.vpn and its directory is /tmp/double/.
# vpncmd localhost /CLIENT /CMD AccountImport double/DoubleSSL_PL1_RU1.vpn
The command below shows all imported VPN chains and their status.
The next step is the setting username and password for the imported config. Replace urusername and urpassword by your username and password in the example below.
vpncmd localhost /CLIENT /CMD AccountList
The username and password are the same as the username and password of the DeepWebVPN Cabinet.
# vpncmd localhost /CLIENT /CMD AccountUsernameSet double-ssl-pl1-ru1 /USERNAME:urusername
# vpncmd localhost /CLIENT /CMD AccountPassword double-ssl-pl1-ru1 /PASSWORD:urpassword /TYPE:radius
Use these commands with the new credentials to change username and password of the chain.
2.2. Connecting
Use the next command to connect the chain.# vpncmd localhost /CLIENT /CMD AccountConnect double-ssl-pl1-ru1Few seconds later check the chain status, successfully connecting status is Connected.
# vpncmd localhost /CLIENT /CMD AccountList
vpncmd command - SoftEther VPN Command Line Management Utility Developer Edition
SoftEther VPN Command Line Management Utility (vpncmd command)
Developer Edition
Version 5.02 Build 5180   (English)
Compiled 2022/12/01 13:53:20 by  at
Copyright (c) all contributors on SoftEther VPN project in GitHub.
Copyright (c) Daiyuu Nobori, SoftEther Project at University of Tsukuba, and SoftEther Corporation.
All rights reserved.

Connected to VPN Client "localhost".

VPN Client>AccountList
AccountList command - Get List of VPN Connection Settings
Item                        |Value
----------------------------+---------------------------------------------------------------------------------
VPN Connection Setting Name |double-ssl-pl1-ru1
Status                      |Connected
VPN Server Hostname         |XX.XX.XX.XX/tcp:443 (Direct TCP/IP Connection)
Virtual Hub                 |double-ssl-pl1-ru1
Virtual Network Adapter Name|VPN
The command completed successful
3. Setting SoftEther VPN routing
3.1. Adding network interface
All actions described in this subparagraph have to execute in the web interface of OpenWrt only.
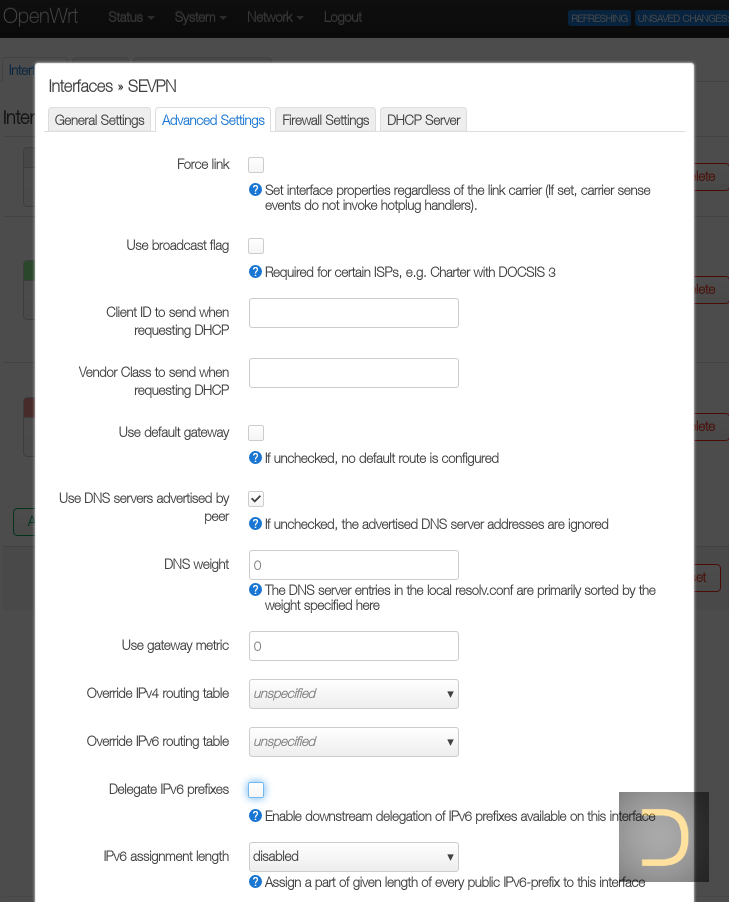
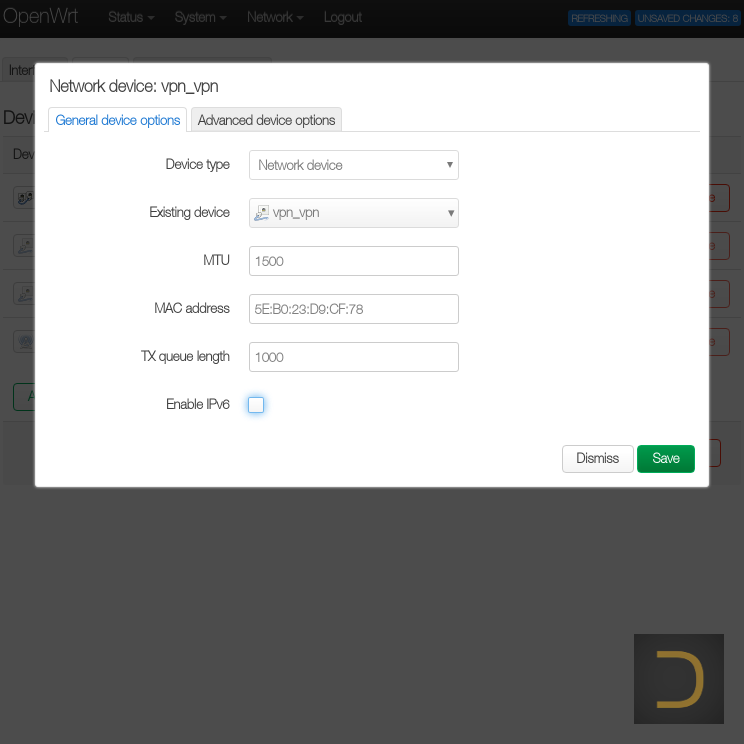
It is necessary to add virtual network interface of SoftEther VPN client in the next step. Go to menu Network -> Interfaces for it. Click to Add new interface..., enter name of the interface (eg SEVPN), set DHCP Client in the field Protocol and vpn_vpn to Device in the appeared window.


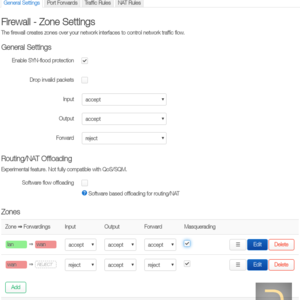
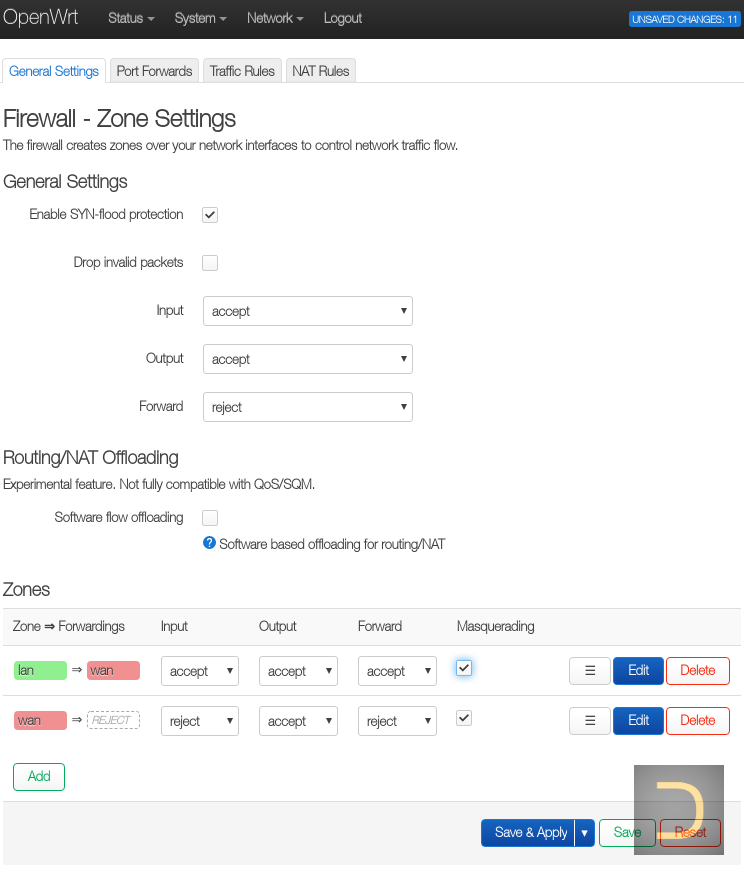
The Masquerading from the menu Network -> Firewall has to be enabled for the network that shares through VPN.
3.2. Changing default gateway
All actions described in this subparagraph have to execute in SSH session of OpenWrt only.
It is necessary to know the default gateway for the next steps. The default gateway usually belongs to a network interface that provides connection to an external network, it is lan0 in the example below.
# netstat -rn
Kernel IP routing table
Destination     Gateway         Genmask         Flags   MSS Window  irtt Iface
0.0.0.0         192.168.100.1    0.0.0.0         UG        0 0          0 lan0
Making sure that SoftEther connection is established (has status Connected, q.v. subpar. 2.2) and the interface vpn_vpn has IP add IP of incoming server of VPN chain as a gateway.
Subnet for the SoftEther Single chains is 192.168.234.0/24, for the Double chains is 192.168.244.0/24. Thus VPN connection gateway of the Single chains (not external gateway!) is 192.168.234.1, of the Double chain is 192.168.244.1.
In the example below XX.XX.XX.XX is external IP of incoming server of VPN chain (q.v. Determining IP of VPN chain incoming server), 192.168.100.1 is the current default gateway.
# ip route add XX.XX.XX.XX via 192.168.100.1The next command delete the current default gateway and set VPN chain gateway (192.168.244.1 because the Double chain in the example below) as the default gateway.
# ip route del default via 192.168.100.1 && ip route add default via 192.168.244.1 dev vpn_vpn
4. Connecting SoftEther VPN on boot
All actions described in this paragraph have to execute in the web interface of OpenWrt only.
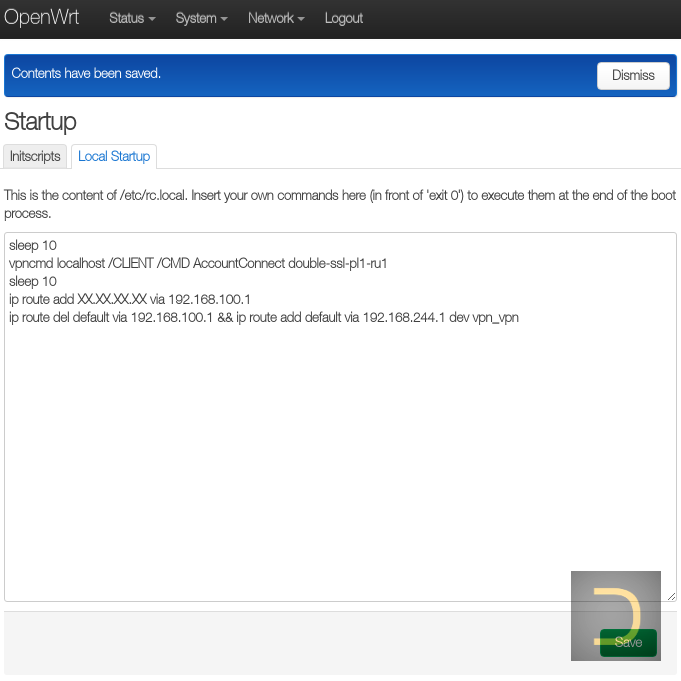
Go to System -> Startup and open the tab Local Startup that has text field with the startup script content (file /etc/rc.local). Insert in the script the connecting and routing commands and click Save to save the script. The example below contents script to connect the chain double-ssl-pl1-ru1, where XX.XX.XX.XX is external IP of incoming server of VPN chain (q.v. Determining IP of VPN chain incoming server), 192.168.100.1 is the current default gateway.
sleep 10
vpncmd localhost /CLIENT /CMD AccountConnect double-ssl-pl1-ru1
sleep 10
ip route add XX.XX.XX.XX via 192.168.100.1
ip route del default via 192.168.100.1 && ip route add default via 192.168.244.1 dev vpn_v