DNS settings on Windows
1. Setting DNS on Windows 2. Flushing DNS cache on WindowsDeepWebVPN DNS servers are working if you are connected to the DeepWebVPN VPN network only. Use another DNS servers for correctly working of the Internet if you are not connected to the DeepWebVPN VPN network.
We recommend to read the project StopWatchingFor.Us to limit unwanted tracking by various trackers from both Web (Google Analytics, Adobe Analytics, Yandex.Metrica and others) and system applications (Microsoft Security Essentials, TeamViewer, Avast, McAfee and others).
1. Setting DNS
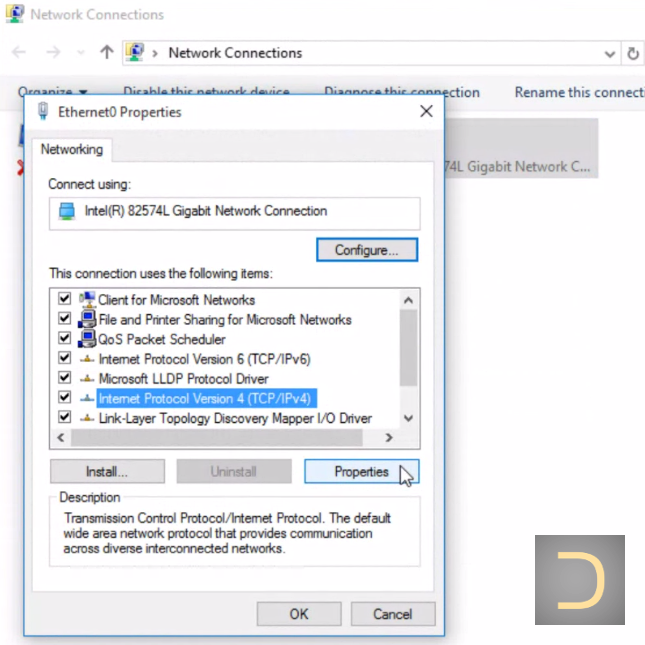
Go to Windows Control Panel and select Network Connections. Right click the network connection you're using and select Properties.
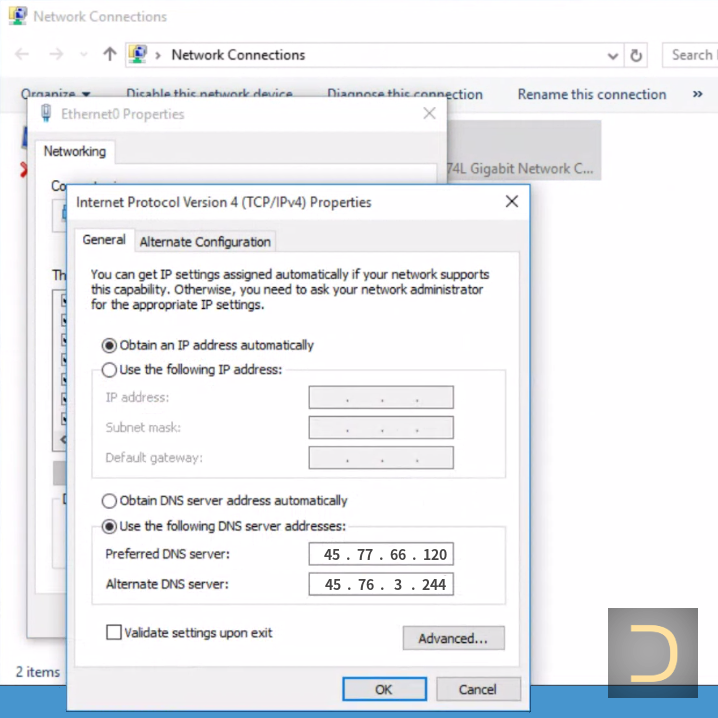
The list of DeepWebVPN DNS servers is available on the subscription page.
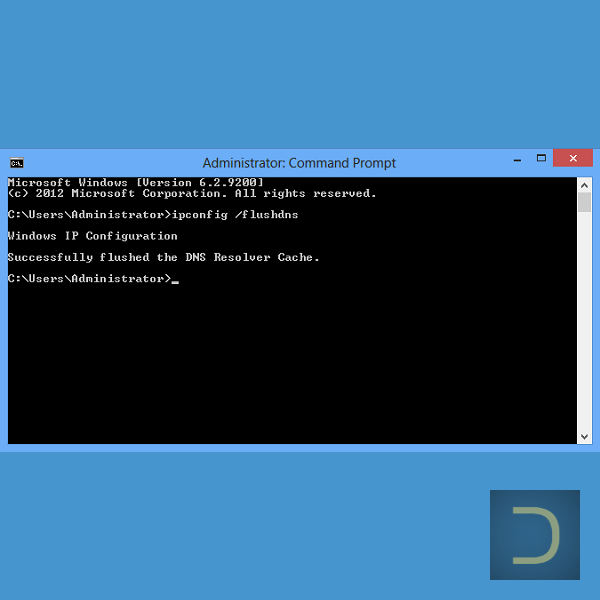
2. Flushing DNS cache
Press Windows+R to open the Run box. Type cmd into the box and then press Ctrl+Shift+Enter to run the Command Prompt as an administrator.

Open the Command Prompt as an administrator and use the next command to flushing DNS cache.

ipconfig /flushdns